


Provox SmartInserter - UPDATE MAY 2012
A revised version of the Provox® SmartInserter for the insertion of the Provox Vega prosthesis has been introduced in Germany in May 2012. It replaces the first version of the SmartInserter that caused some difficulties in placing the voice prosthesis to some users.
The loading tube of the new SmartInserter was extended to 82 mm in order to increase visibility in the tracheostomy. A transparent material has been used for the loading tube to allow for better observation of the folding of the esophageal flange and the placement of the voice prosthesis. The folding mechanism has been optimized and works more soft and reliable now. The tip of the well established Provox 2 loading tube has been adopted to avoid the “kickback” of the inserter during the passage of the voice prosthesis through the tip, that was frequently reported. The atraumatic webs between the individual branches of the tip of the old SmartInserter have been given up.
The lock wings of the guide (blue) have been reinforced to prevent an unintended overshooting due to an inadvertent pressure during the insertion. As the insertion rod has been extended, too, the single handed insertion is not possible anymore with small hands. Therefore some notches have been made to the end of the insertion rod to simplify the advancing of the insertion rod with the second hand.
Clinical experience has confirmed the improvements of the new SmartInserter.
All functions of the SmartInserter remain unchanged as shown here!
Insertion of the Provox® Vega™ using the SmartInserter™
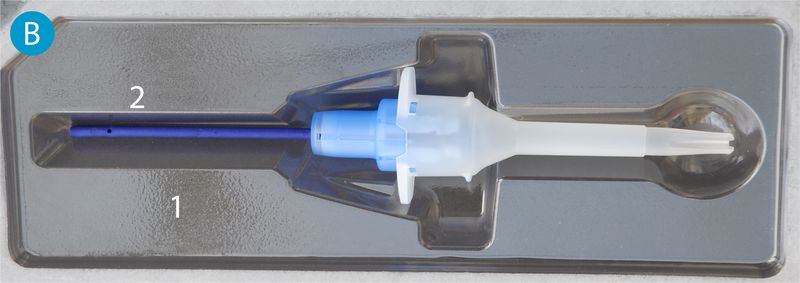
The Provox® SmartInserter™ is intended to make changing the voice prosthesis easier and safer. The Provox® Vega™ prosthesis is preloaded in the SmartInserter™ and ready for use (fig. B) in the original packaging (1). There is no need to insert the prosthesis in the inserter, as for the Provox® 2.
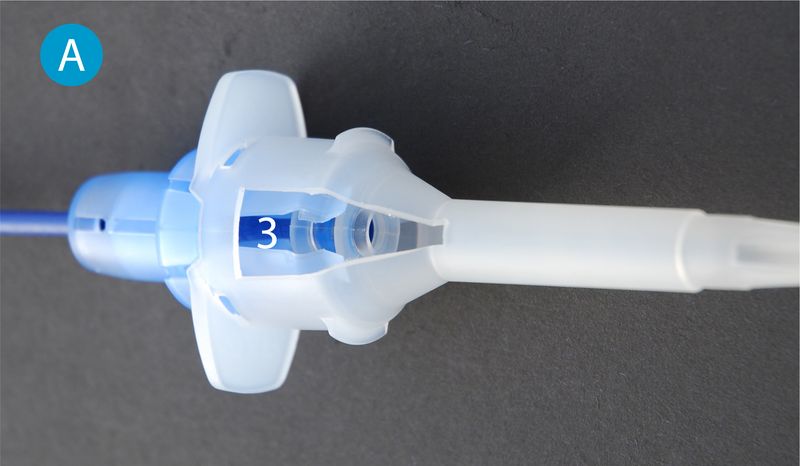
Ex works the Vega™ prosthesis is attached to the insertion rod (fig. D) and sits unfolded in the middle part (3) of the SmartInserter™.

Insertion of the voice prosthesis using the SmartInserter
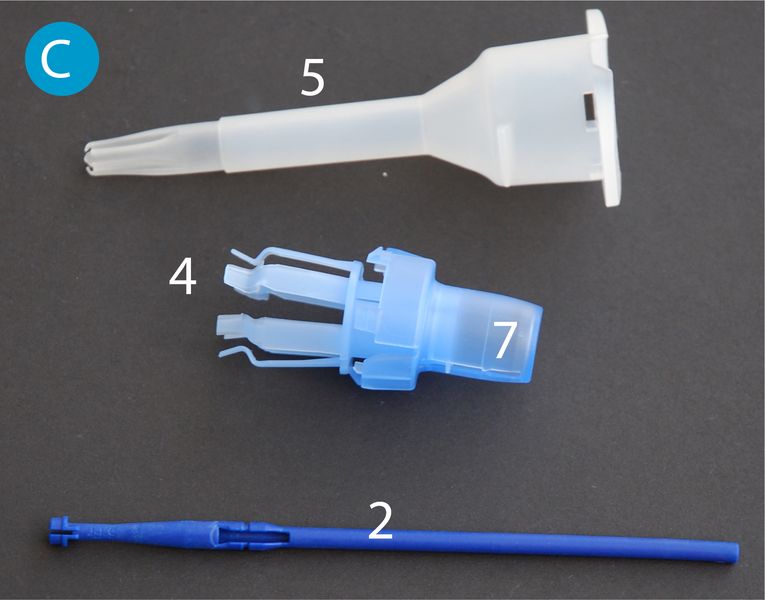
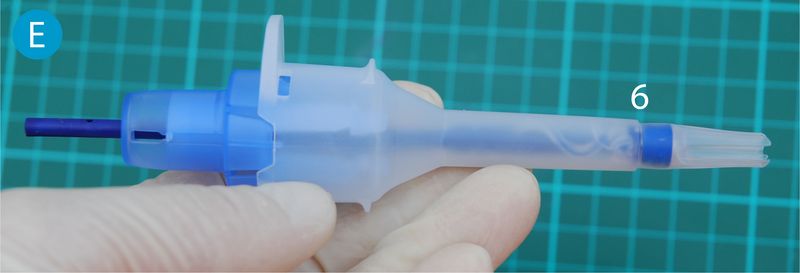
Pressing on the blue insertion rod causes the fitted folding aid to automatically fold the prosthesis and push it into the loading cannula (5) until it is appears in the window (6) at the distal end of the loading cannula. The prosthesis is now ready for use. The inserter is pushed into the shunt until its tip is in the esophagus.
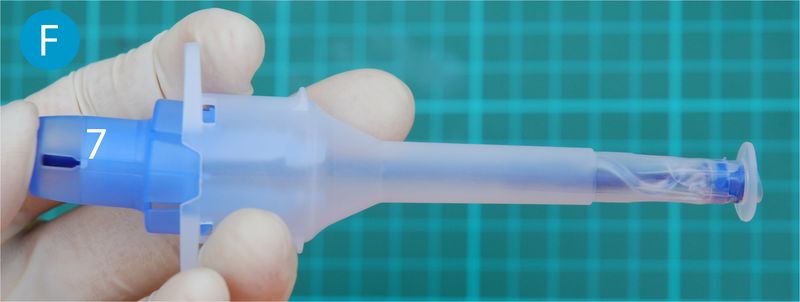
If the insertion rod is pushed all the way into the guide (7) until it stops, the voice prosthesis will be discharged from the loading cannula exactly to the point were the esophageal flange unfolds (ill. F). The arrester of the inserter stops the thumb and will prevent the whole voice prosthesis from overshooting into the esophagus.
Once the esophageal flange has unfolded, the inserter can be removed and the thread (8) trimmed.


Overshooting with the SmartInserter™
The Provox® SmartInserter™ is designed to prevent overshooting (accidentally pushing the whole voice prosthesis into the esophagus, resulting in the need to reposition the tracheal flange in the trachea). However, there are situations in which overshooting is desired.
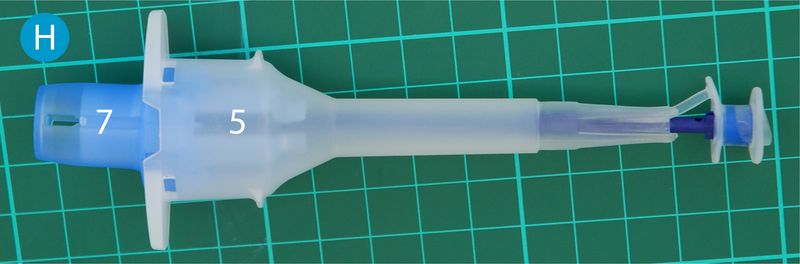
If it is not possible to position the esophageal flange safely in the esophagus using the standard insertion method of the SmartInserter (fig. G), then the whole prosthesis may be pushed into the esophagus by deliberately overshooting (fig. H). The tracheal flange is then pulled back into the trachea by two vascular clamps. Overshooting is also possible with the SmartInserter™. To achieve this, the loading rod and the blue guide (7) are pushed approx. 2 cm further into the loading cannula (5; figs. H and J).
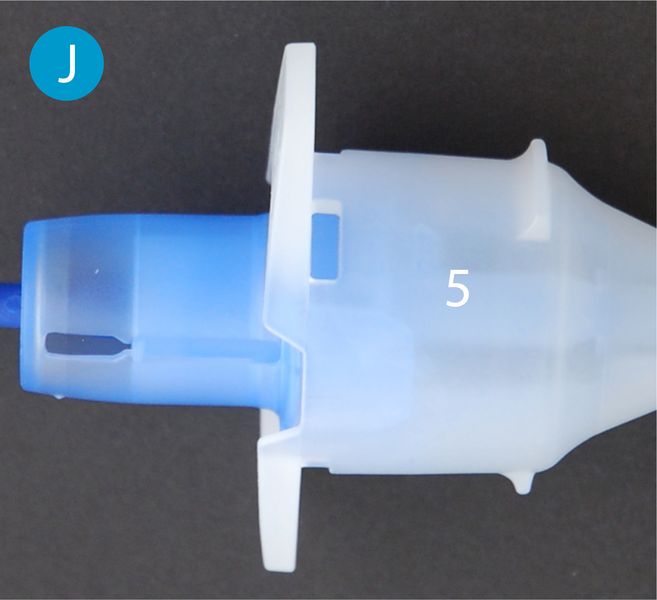
Both sides of the guide must be released before it can be pushed forward in the loading cannula. This is achieved by pressing on the locking wings (9) of the guide. Once the guide has been released, it can be pushed forward in the loading cannula as shown in fig. J. This enables the Vega™ prosthesis to be pushed forward by approx. 2 additional cm (fig. H).
Reloading the SmartInserter™
Insertion of the voice prosthesis can fail for various reasons. This will necessitate the voice prosthesis being reloaded in the insertion system.
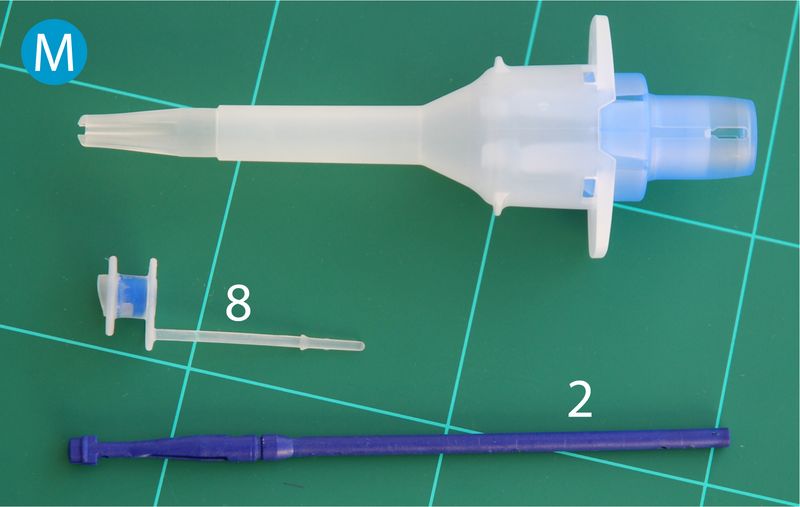
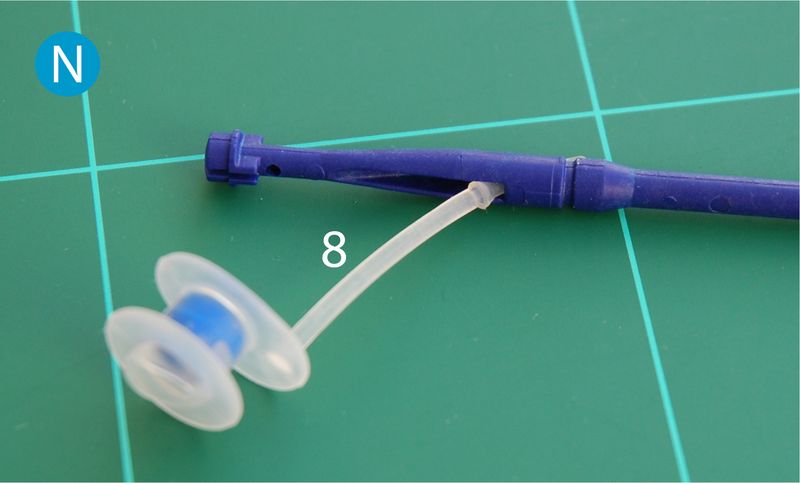
First, the Provox® Vega™ prosthesis is reattached to the insertion rod (2). The thread is inserted in the opening that is closest to the tip of the insertion rod (fig. N).
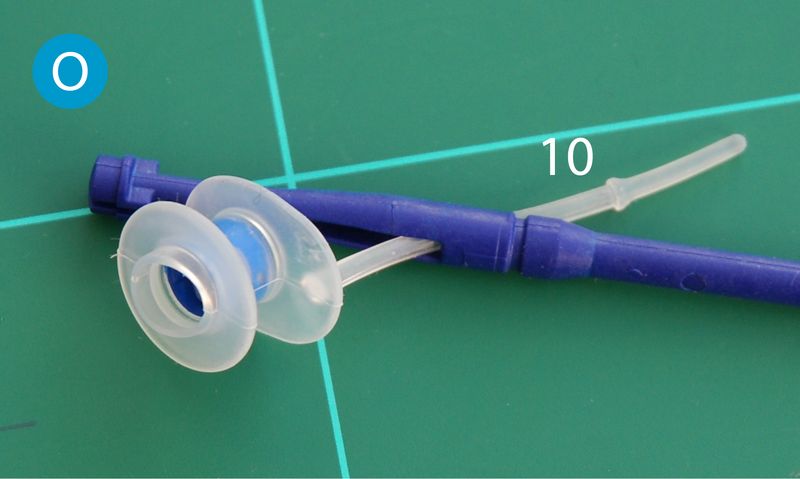
The thread is now pulled through the insertion rod until the safety cone (10) has passed all the way through the insertion rod (fig. O).
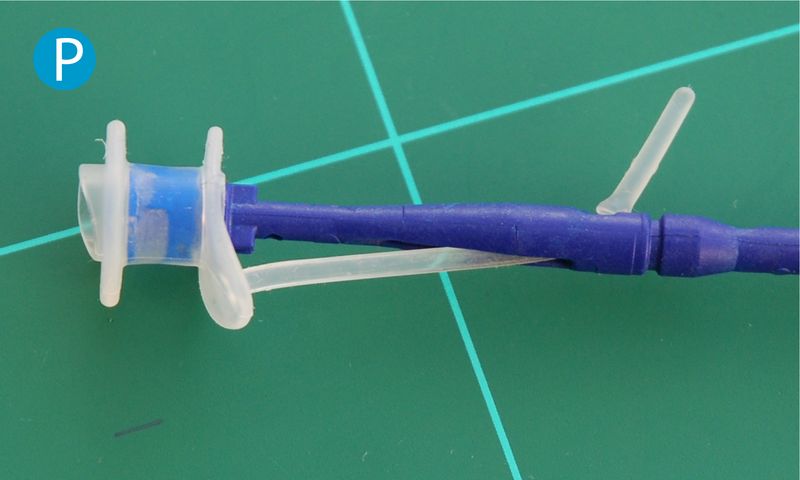
The tracheal flange of the Vega™ prosthesis is now placed on the tip of the insertion rod (fig. P). The safety cone secures the thread on the insertion rod.
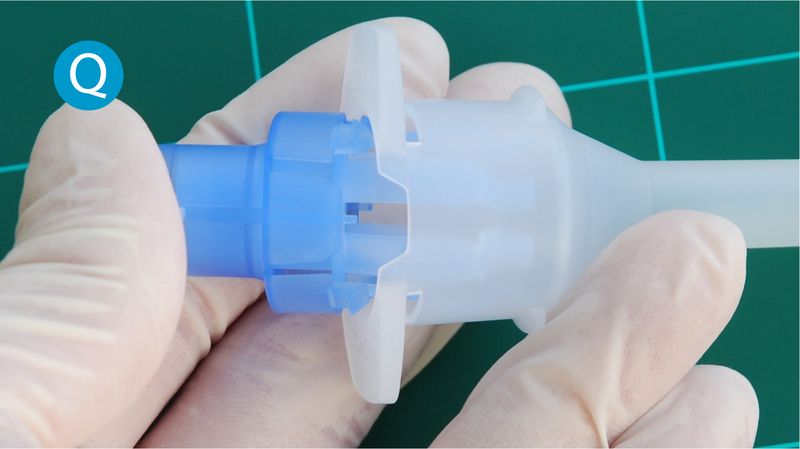
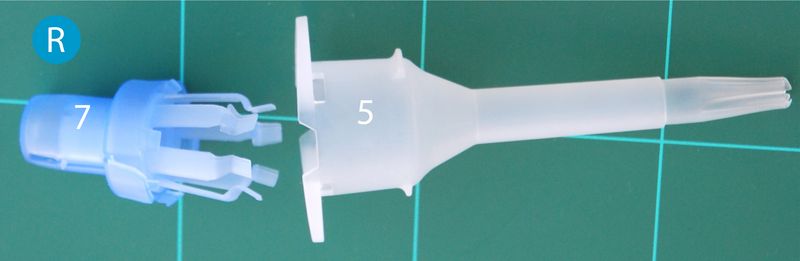

Once the Vega prosthesis has been secured to the insertion rod, the rod and prosthesis are placed in the guide. To achieve this, the guide (7) is pulled off the loading tube (figs. Q and R).
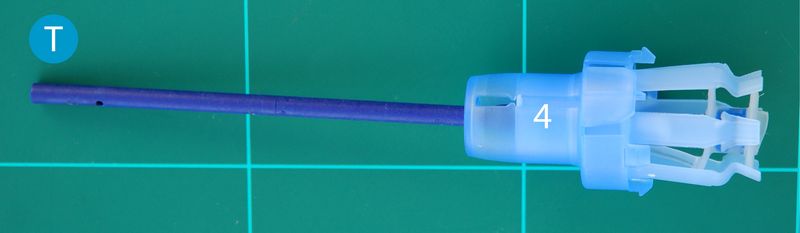
The insertion rod and attached Vega™ prosthesis are placed in the guide from the front (fig. S) and pulled through until it noticeably clicks into place (fig. T). The esophageal flange of the Vega™ prosthesis then closes flush with the folding aid (4) of the guide.
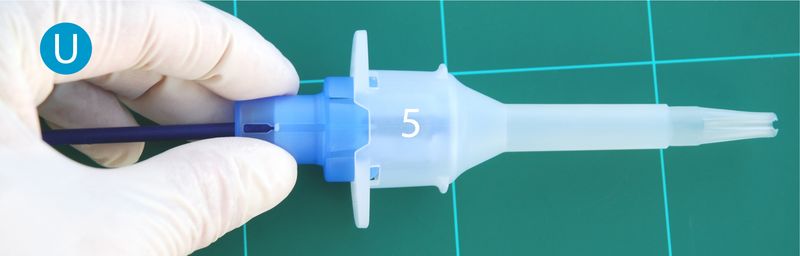
The loading tube (5) is now placed on the guide (fig. U) - and the Vega™ prosthesis is ready for use.
NOTE: The loading cannula of the SmartInserter™ is prelubricated in order to prevent damage to the prosthesis when it is being pushed. The lubricant wears away with repeated use. The manufacturer therefore advises against reloading the SmartInserter™ more than twice.